How To Build A Shed
How To Build A Storage Shed
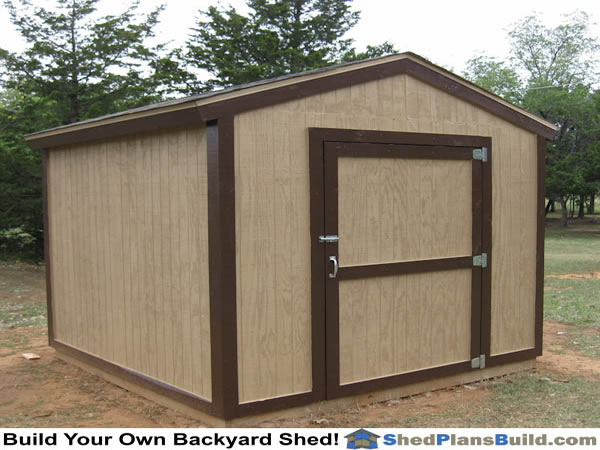
Building your own backyard storage shed is a rewarding project. Sheds are great for many uses including storing bikes and lawnmowers so you can put your car in your garage, a home office, a workshop where your tools can be left out ready to work, a art studio or a greenhouse to grow plants.
This article takes you through every step to building an 8x10 storage shed. The same techniques of framing a foundation, floor walls, roof and door can be used for sheds of all sizes.
1 - How To Build A Shed Foundation
The first step in building a shed is to build the foundation. There are several ways to build a foundaion for your storage shed. In this example we will show you one of the most shed foundations, Pressure Treated Wood Rails.
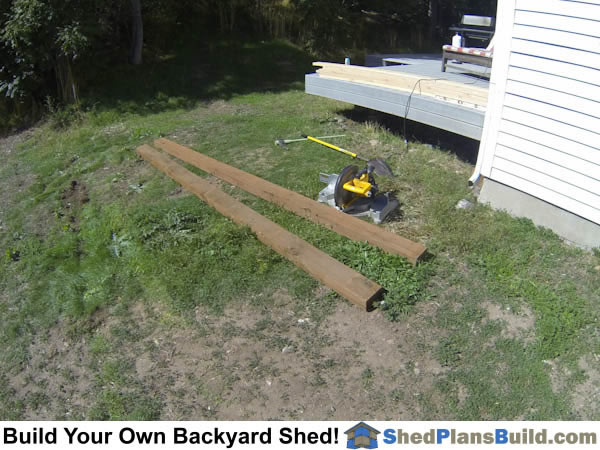 Cut The Shed Foundation Rails: The first step in building the shed foundation is to cut the Treated wood rails to the correct length. It is important that the rails are exactly the same length so that you will be able to make them square.
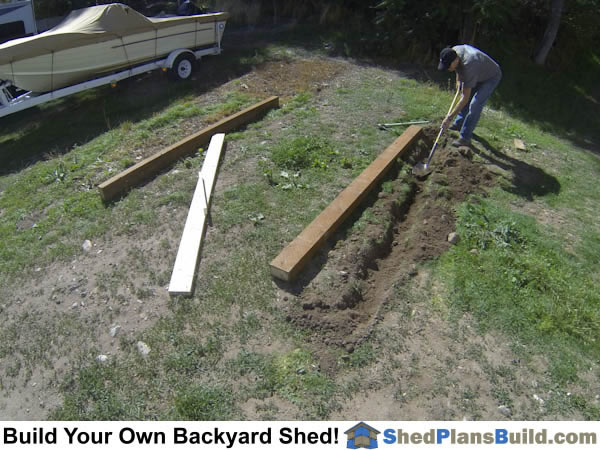 Prepare The Ground Under The Rails: Put the rails in their approximate locations. Then move them to the side and prepare the ground where they will sit. You may need to dig down or raise up. Gravel works best under the rails.
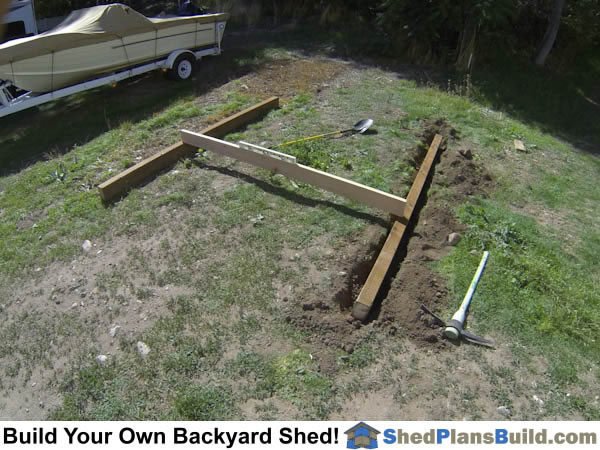 Level The Rails: Use a straight 2x board with a level on it to check that the two rails are level with each other. Make sure to check both ends of the rails. Also, check each rail that it is level from end to end.
 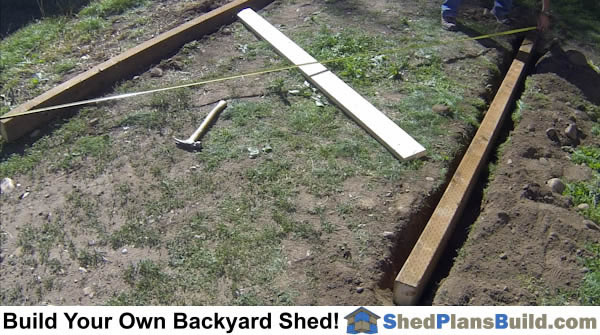 Square The Rails:The final step is to square the rails with each other. After making sure that the ends of the rails are the same distance from each other you will measure diagonally from corner to corner. Move the rails parallel to each other until the diagonal measurement is the same. Double check the rail distance from each other.
2 - How To Build A Shed Floor
The shed floor framing goes on top of the foundation. It is typically framed using floor joists and floor sheeting.
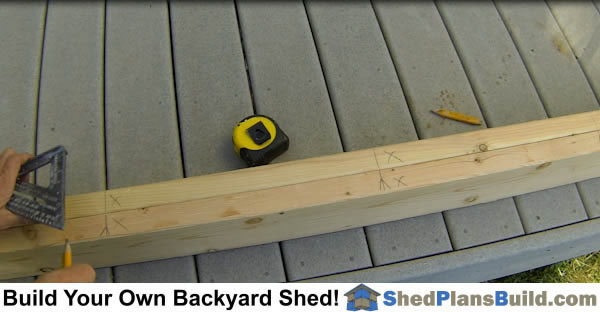 Layout Rim Joists: The first step in building the floor framing is to put layout marks on the two rim joist boards.
Cut the two rim boards to the same length. Crown the boards and set them next to each other with the ends flushed.
Once you have located the layout marks on the board use a square to mark a line across both of the plates at each layout mark. Put an X on the proper side of the line at each mark.
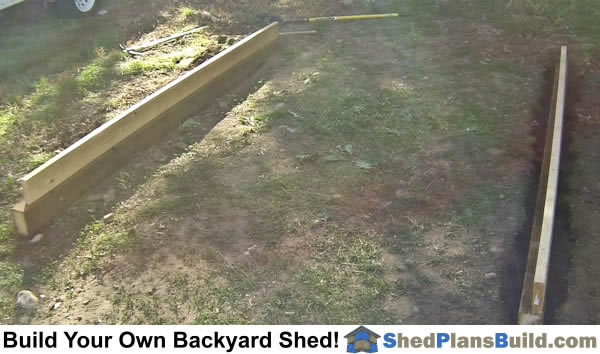 Set The Joist On The Rails: Separate the rim boards and set one one each of the rails. Make sure that the layout marks are coming from the same ends.
 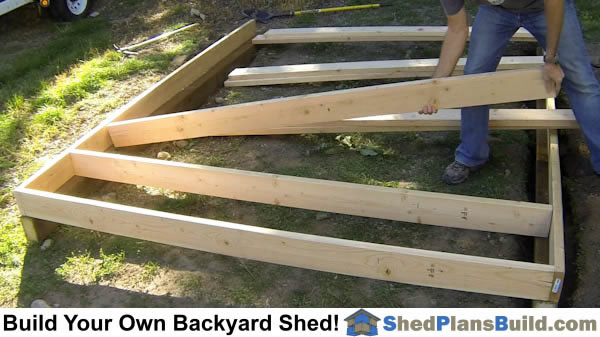 Set The Joists: Place the shed floor joists between the rim joists. Crown each board by looking down the board edge and putting the crown up. Line up the edge of each joist with its respective layout mark on the rim board, make sure that it is on the proper side of the X and that the board tops are flush and then nail the boards together.
 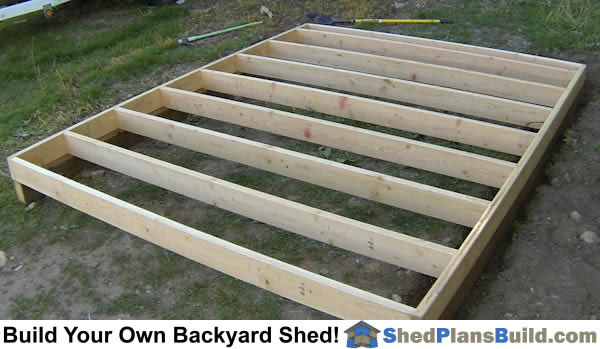 Nail The Joists: Nail the rim joist to the floor joists. Use 3 nails at each end of each board.
 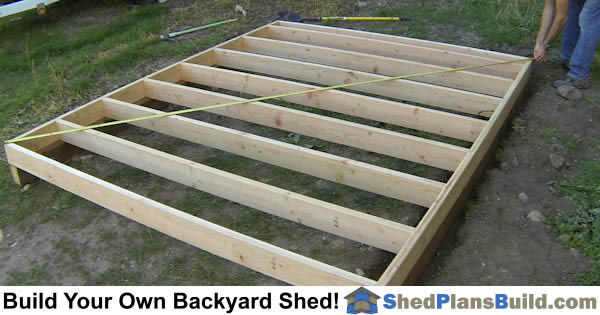 Square The Shed Floor Framing: To make the floor framing square you will hook a tape measure on a corner and pull it to the diagonal corner. Check the dimension and then do the same across the other diagonal. Move the rim boards parallel to each other until the two dimensions are the same.
 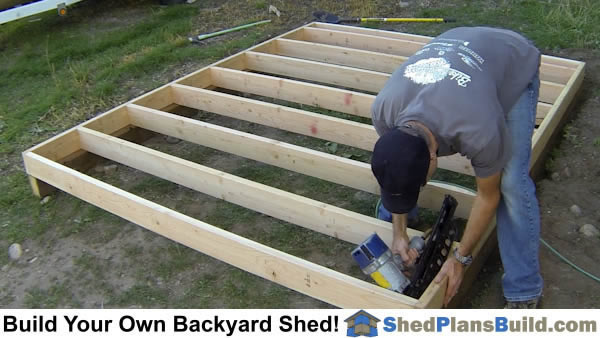 Attach The Joists To The Rails: To attach the floor framing you should use an angled metal clip. You can also install nails by toe nailing the rim joist to the wood rail. Install a 2 1/2" nail in between every set of joists.
 Install Floor Sheeting: Test fit the first sheet to see if it lines up with the joists. The sheet should be flush with the outer edges of the floor joists. Iit should split down the edge of the joist in the center AND the Tongue edge of the sheet should over hang the rim joist on the outside edge of the floor.
 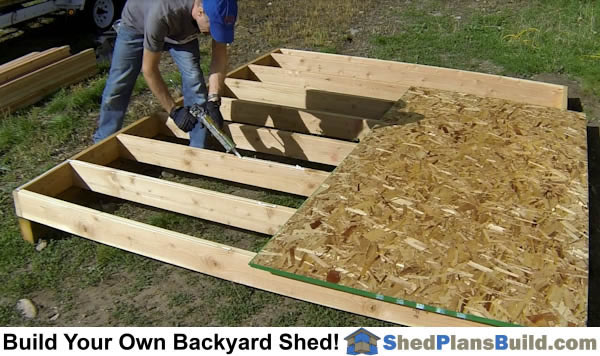 Put Glue On The Joists: Gluing the joists makes the floor stronger. Flip the sheet that you test fitted out of the way. Install a 1/4" bead of glue on the top of the floor joists where the first sheet will sit. Only put glue where the sheet you are installing will go or it will get on everything.
 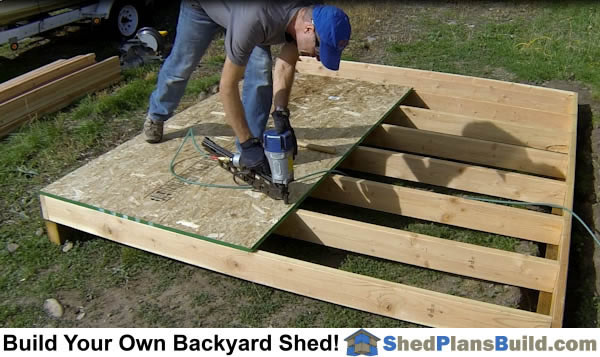 Set The First Sheet And Nail It: Flip the floor sheeting piece back over and onto the joists you put glue down on. Square up the edges with the floor joists and rim joist and then nail it to the joists. When building a shed floor you should place a nail at 6 inches along the edges and 12 inches apart in the center.
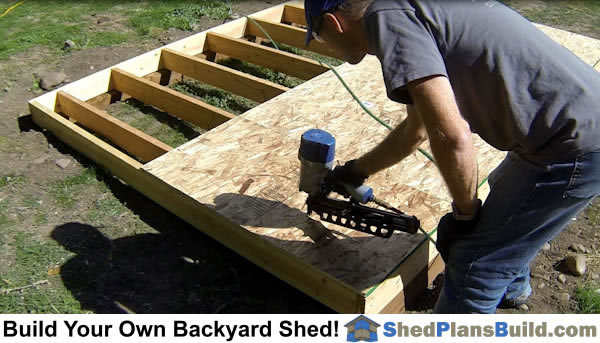 Continue Installing Sheets: Continue installing sheets along the same row of sheeting. You may not need to test fit the sheets if you think the rest of the sheets will fit well. When you get to the other end of the shed floor you can pre cut the last sheet and then install it.
 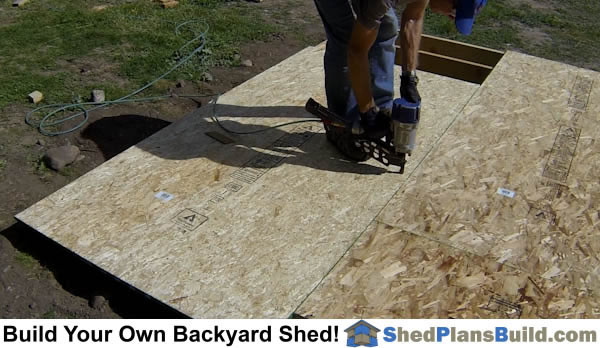 Install More Rows: If your shed is wider than 8 feet you will install a second row of sheets. The second row should be offset at least 16 inches from the first row. The tongue edge of the new row must fit tightly into the groove of the preceeding row. Use a block of 2x4 to protect the edge as you hit the new sheet in.
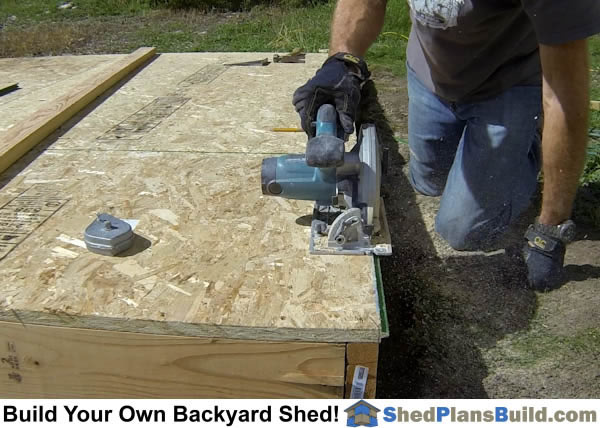 Cut The Tongue Off The Sheeting: If your shed floor is the width to end on a full sheet then you will need to cut off the tongue edge. ie. 4', 8', 12', 16' wide.
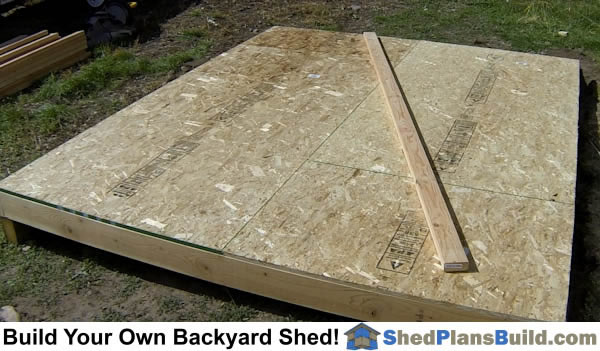 Completed Shed Floor Framing: Now that the floor sheeting is installed you are ready to mark the wall locations and use the shed floor to build rafters and shed walls on.
3 - How To Build Roof Rafters
The shed roof rafters are built before building the shed walls because it makes it much easier to cut and test the rafters with the large flat surface of the newly framed shed floor. You can even draw the rafters full size on the floor to make sure that the angles are correct. The floor also helps in making a jig. You can attach blocks to the shed floor to hold the roof rafters while you fasten the ends together. This ensures that all the shed roof rafters will be the same. When making cuts for rafters you need to be careful to always cut on the waste side of the line so that all the rafters are as close to the same as possible.
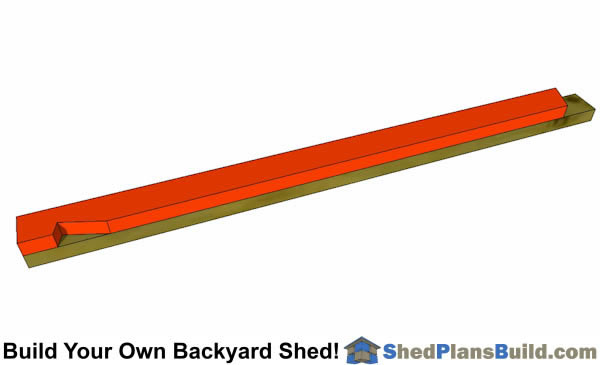 Parts Of A Rafter: The top end of the rafter when it is in its position on the roof is called the ridge end. The lower end is called the eve end. The birds mouth and seat cuts are used to allow the rafter to sit on the shed walls flat. The vertical cut is called a Birdsmouth and the horizontal cut is the Seat cut.
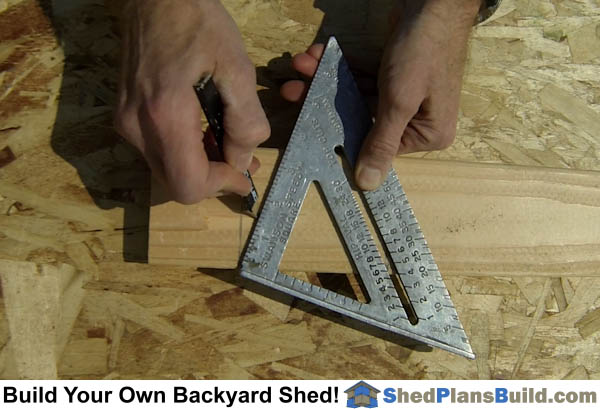 Make The Ridge Cut: Start by marking the ridge cut on a rafter board. Place the speed square on what will be the top edge of the board and pivot it until the proper roof slope marks line up with the edge of the board and mark the board.
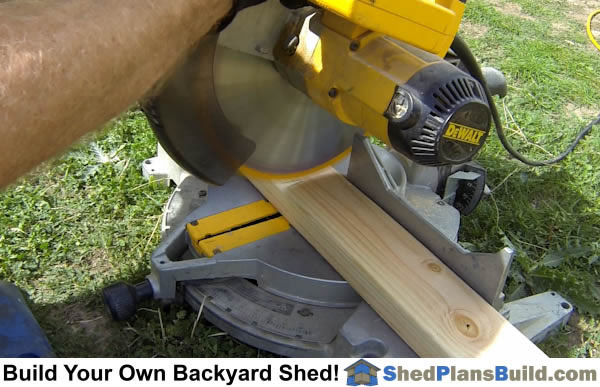
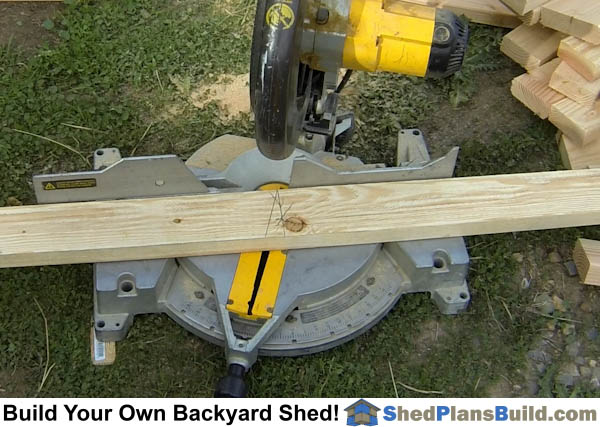 Cut The Ridge Cut: Cut the shed roof rafter on the mark. If you have a chop saw you can simply set the saw to the angle and cut it
Cut The Eve End: Place the pivot point of the speed square on the mark on the eve end of the rafter. Pivot the square to the 4 in 12 angle and mark the angle for the eve cut. Cut the waste off the eve end off the board.Birdsmouth: Use the plans to locate and mark the point where the birdsmouth meets the bottom edge of the rafter. Set the pivot point of the speed square on this point and pivot it until it hits the 4/12 marks. Mark the birdsmouth cut line.
Mark the depth of the seat cut on the line.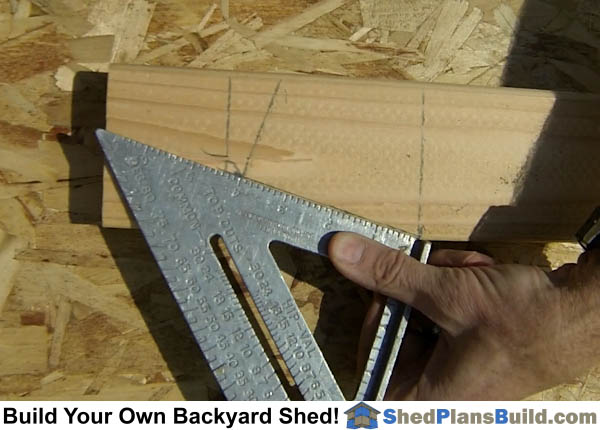 Seat Cut: Then measure and mark the point where the seat cut meets the bottom of the rafter. Set the pivot point of the square on this point and draw a line from the depth mark on the birdsmouth cut to the location mark for the seat cut.
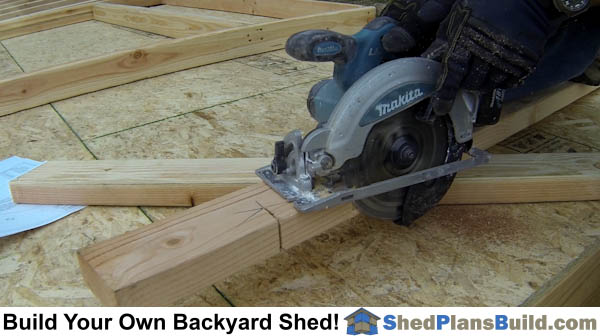 The rafters are now ready to be cut so they can sit on the shed walls. Cut along the waste side of the marks with a circular saw set to its deepest cut setting. Make sure that you only cut to the intersection of the two lines.
  The piece of wood may not immediately fall out. The piece of wood can be removed from the shed roof rafter using a hand saw or chisel. Remove The Waste: Cut along the waste side of the marks with a circular saw set to its deepest cut setting. Make sure that you only cut to the intersection of the two lines. The piece of wood may not immediately fall out. The piece of wood can be removed from the shed roof rafter using a hand saw or chisel.
 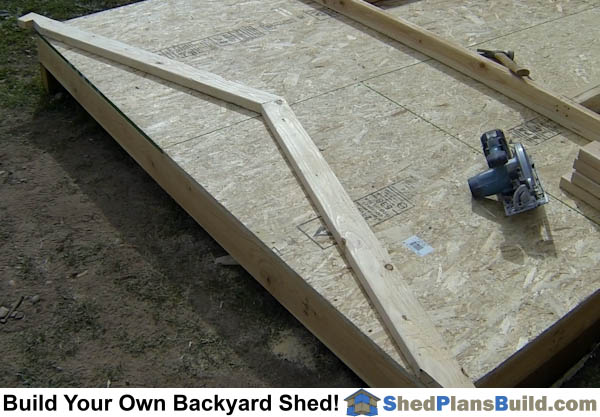 Test Fit: Use one end of the shed floor to act as the wall top plates. Mark the height of the ridge above the shed wall top plates on the shed floor, find the center ridge point on the line. Set the rafter ridge on the mark and its seat cut on the edge of the shed floor to test fit.
 Template: If the first rafter fits then use it as a template to mark the cuts for the birdsmouth, seat cut, eve end and ridge cuts on another rafter board. Cut the second and third rafters out using the first roof rafter as a template.
 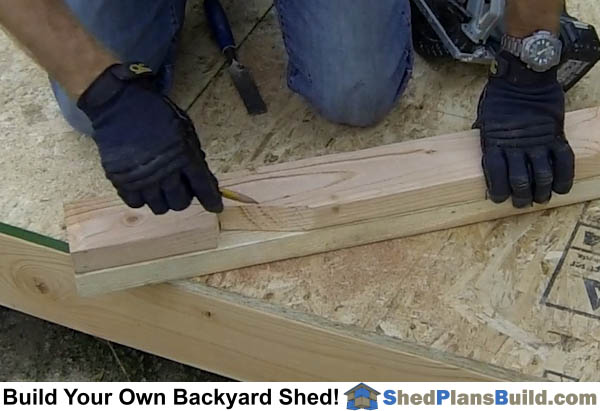 Always use the first rafter as a template to mark all the other rafters so they are all as close to the first rafter as possible.
 Make A Rafter Jig: A rafter jig will keep the rafters consistently aligned when you nail them together.
The ridge cuts on both rafters should be fully touching each other and the seat cuts should be flush with the edge of the shed floor.
Attach wood blocks to the floor to hold the rafters in place while you nail them together.
 Make Rafter Gussets: Cut out Gussets from 7/16" O.S.B. After drawing and cutting out the first gusset use it to trace the other gussets.
 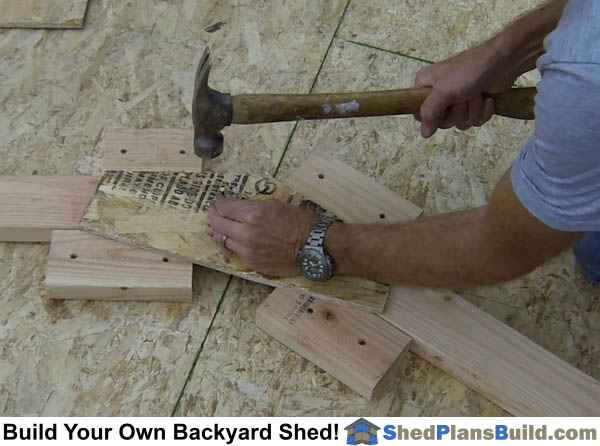 Nail The Gusset On The Rafter: Use 2" nails to attach the gussets to the rafter peaks. After the first gusset is attached flip the rafter assembly over and attach a gusset to the other side. The two gable rafter only have gussets on one side.
 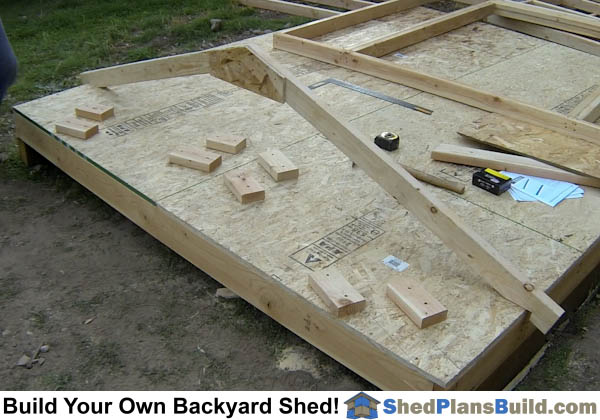 Test The Rafter: After it is nailed together stand the rafter up and set it on the shed floor. Center it as if it were on the top of the shed walls to check its fit.
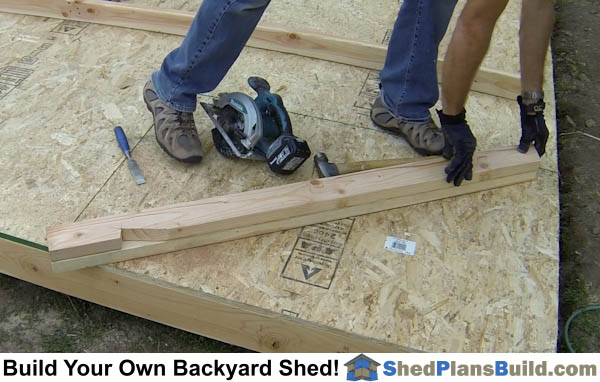
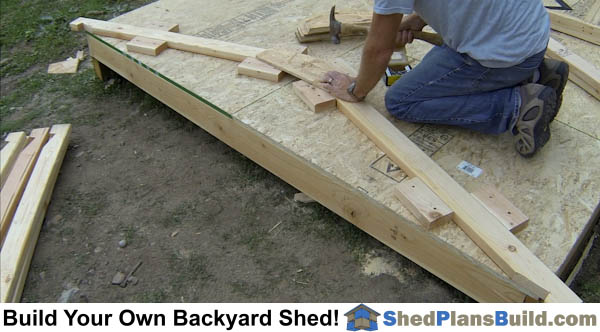 Build The Remaining Rafters: Now you can use the rafter jig to build the remaining rafters.
4 - How To Build Shed Walls
Building shed walls is another framing activity that is easier to do after the shed floor is built. The large work surface is helpful for all but the smallest sheds. The materials you will be using to build the shed walls are the wall studs, the top plates and bottom plates. To frame a door opening you will need to build a shed door header and install trimmer boards to hold the header up.
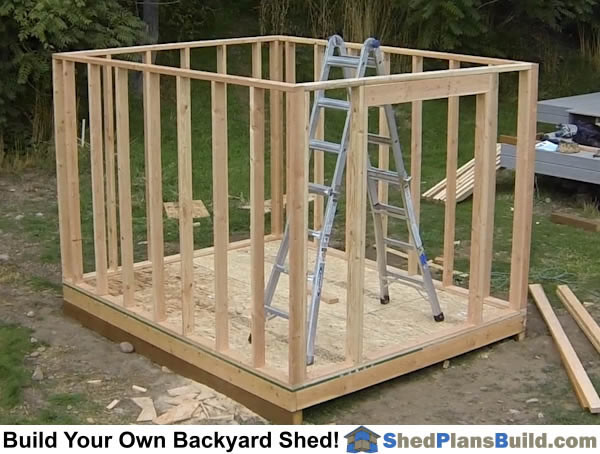 Framing Shed Walls: Shed walls and doorway opening are a fun part of the shed building project.
  Mark The Wall Lines: After sweeping the shed floor clean you will mark the wall locations on the shed floor. If the shed floor is the exact size shown on the plans you will be able to measure in 3 1/2 inches from each of the edges and mark the wall lines. Double check that the distance between the wall marks is 7 inches narrower than the total wall length.
 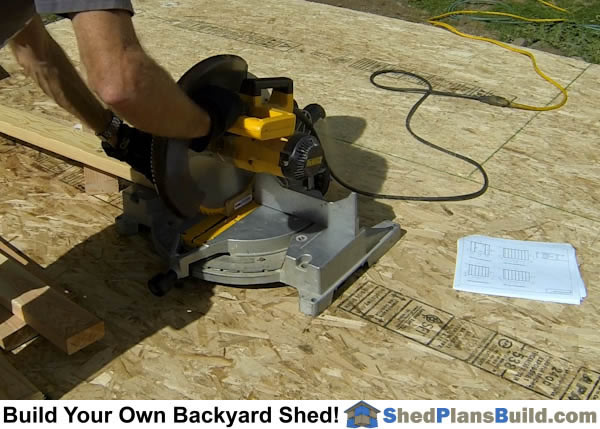 Cut The Shed Wall Plates: Measure the distance between the wall lines and cut the wall plates to match this length. Only two plates need to be cut for each wall at this time.
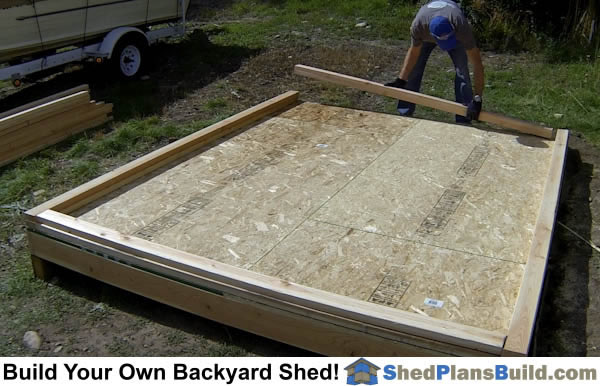 Make Sure The Plates Fit: Set the wall plates in their wall locations. Flush the ends of each set of boards with each other and line them up with the wall marks on the floor. Double check that they line up with the lines.
 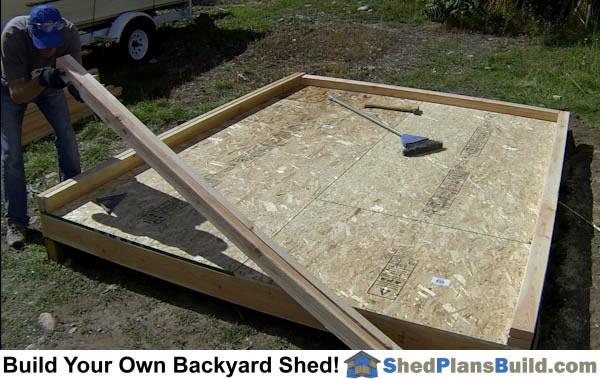 Crown The Wall Plates: Look down the board edges and find the side with the crown. Make sure both crown sides are up for each set of plates.
 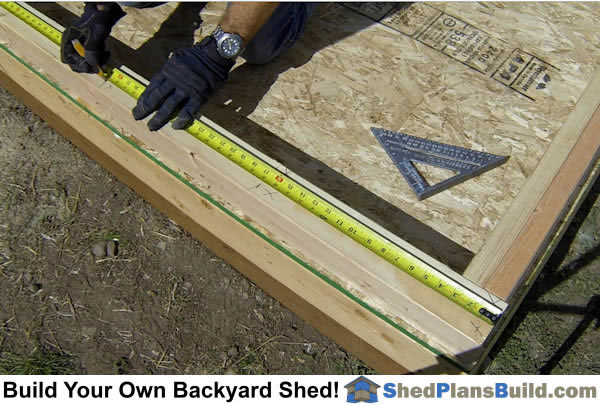 Mark The Wall Stud Layout: With the crown faces up and the ends of the boards flush with each other hook your tape measure on the ends of the boards and pull it down the boards.
 With the tape measure still hooked on the end of the board continue making marks at 3/4" past every multiple of 16. ie. at 32 3/4", 48 3/4" etc.
After the marks are made on the board use a square to mark a line across both of the plates so that both plates are marked the same. Include an X on the correct side of the line on both boards.
Window openings are laid out on the plates in the same way as the shed door openings.
 Cut The Wall Studs: The wall studs are now cut to the length that you want. If you are using the length shown on the plans then verify it on the plans. If you are using pre cut 92 5/8" framing studs then you will not need to cut the studs.
 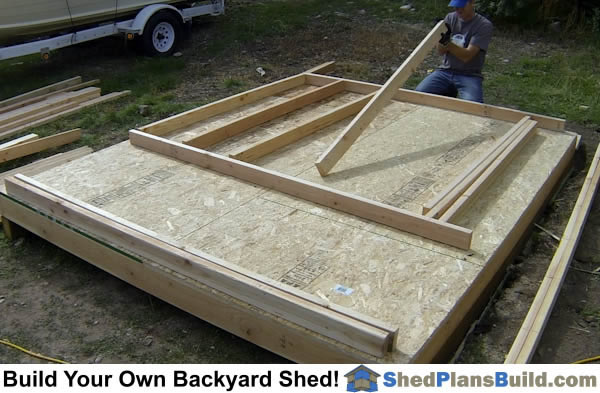 Setup The Walls For Assembly: Take one set of wall plates at a time and separate them. Place enough wall studs between them
so one stud meets each stud mark on the plates. Crown each of the studs and the plates. Make sure that both the ends you laid out the plates are at the same end.
Setup The Walls For Assembly: Take one set of wall plates at a time and separate them. Place enough wall studs between them
so one stud meets each stud mark on the plates. Crown each of the studs and the plates. Make sure that both the ends you laid out the plates are at the same end. 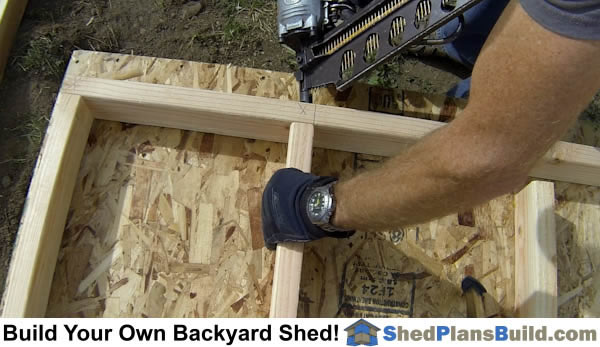 Nail The Shed Walls Together: Hold each of the wall studs up against the plate with its edge aligned with the mark on the plate and on the side of the X. Nail the shed wall plates to the wall studs. Note: If you are building the wall with the shed door then you will install the door framing before the wall studs.
 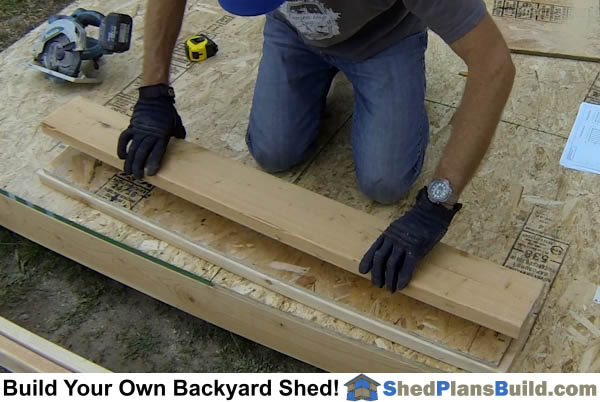 Build The Shed Door Header: The header is built with 2 2x6 or 2x4 boards, see the plans. Cut the header boards to length. Cut a piece of 7/16" O.S.B that is just smaller than the header boards. Put the O.S.B between the crowned boards, flush up the edges and nail together.
 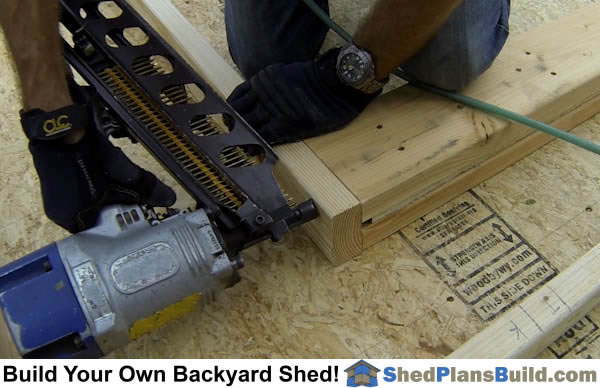 Assemble The Door Opening: Mark the height of the header on the King studs, align the header with the mark and nail the King studs to the header.
 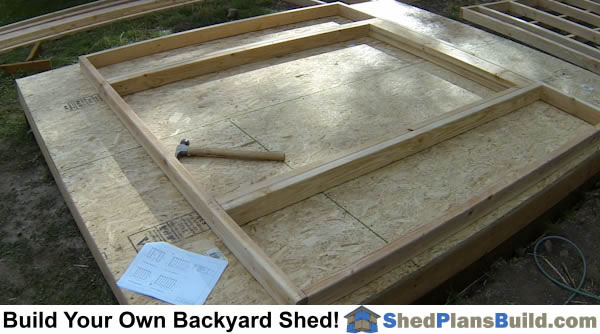 Nail The Door Assembly To The Plates: Line up the King studs with the King stud marks on the top and bottom plates and nail together. Measure and cut and crown the Trimmer boards. Nail the trimmer boards to the King studs. They go on the Trimmer marks and support the header. When used, cripple boards are attached above the header.
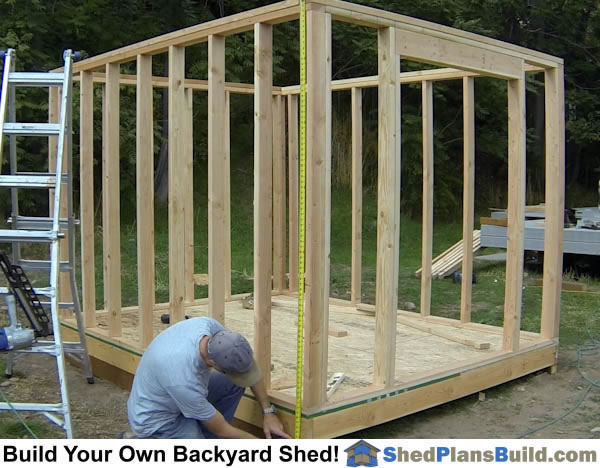
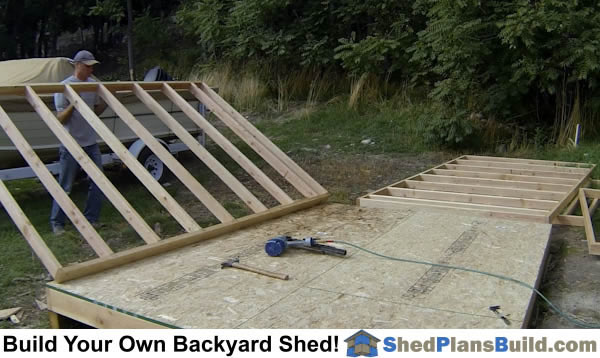 Stand the shed walls: Sweep the floor clean so the shed wall is not held up by anything. Stand one of the long walls first.
 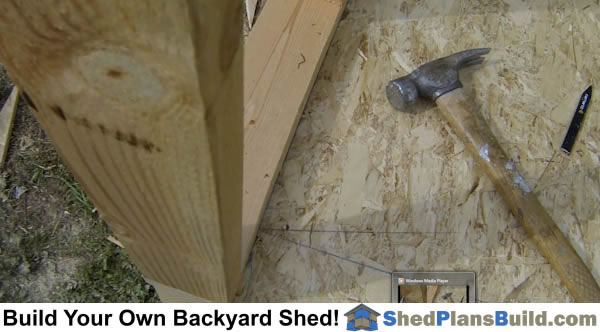 Line The Wall Up: Align the shed wall bottom plates with the line wall marks on the shed floor.
 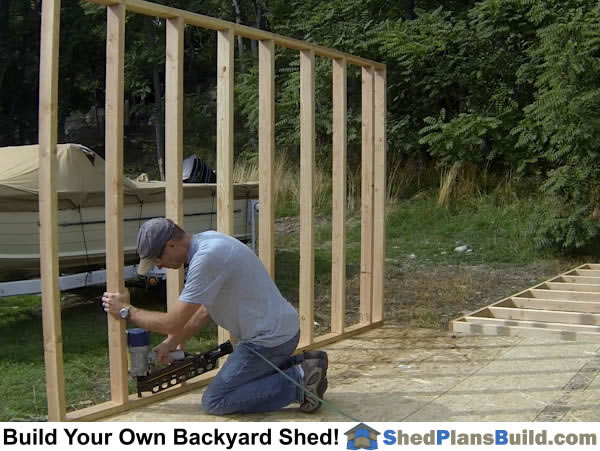 Nail The Wall To The Floor: Put two 3 1/4" nails between each of the stud bays. Try to place the nails so they hit the rim joist or a floor joist. You can find the floor joists by looking for nail heads on the shed floor.
 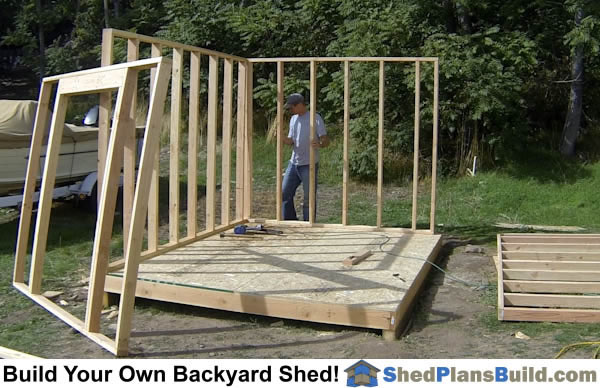 Stand The Rest Of The Walls: After the first wall is up you will continue standing walls around the shed. Stand each wall, flush it up with the marks on the floor and the adjacent wall and nail it to the floor.
  Attach The Shed Walls At The Corners: Align the corners of the shed wall framing and make them flush with each other. Nail them together using a nail about every 12 inches from the floor to the top of the walls. All Walls Standing: Once all the walls are stood you are ready to install the wall top plates.
 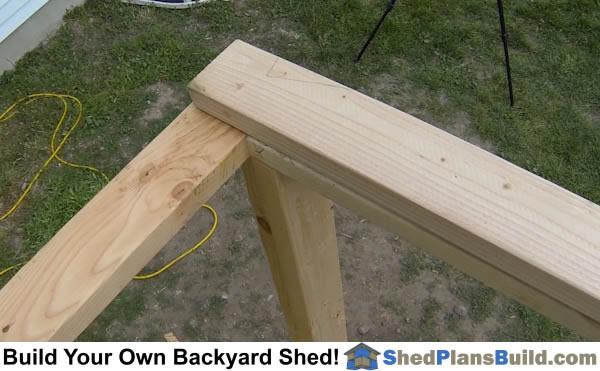 Wall Top Plates: Installing a second top plate locks the walls together and strengthens the top of the wall so it will better hold the shed roof framing.
 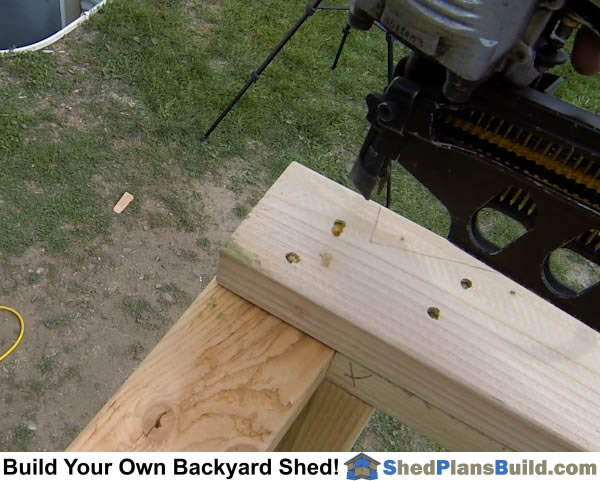 Overlap The Wall Plates: The first two wall plates are installed so that they overlap from one wall to the adjacent wall. Then install the two remaining filler top plates on the other walls.
5 - How To Install Siding On Your Storage Shed
The shed siding is installed on the shed wall framing before the roof rafters because the siding makes the walls rigid. The process of installing the siding makes the walls square and stops them from wobbling.
 Find Shed Siding Height: Measure the height of the siding sheets. The siding should cover the floor sheeting gap by 1-1/2" and can go lower.
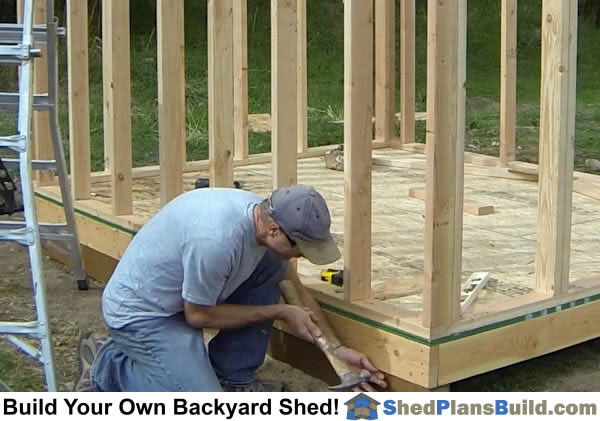 Install Nails To Hold The Siding: To make the siding easier to hold while you attach it you may install temporary nails at the bottom edge of the sheets. Make sure that the fisst sheet is oriented so its edge will be covered by the following sheets.
 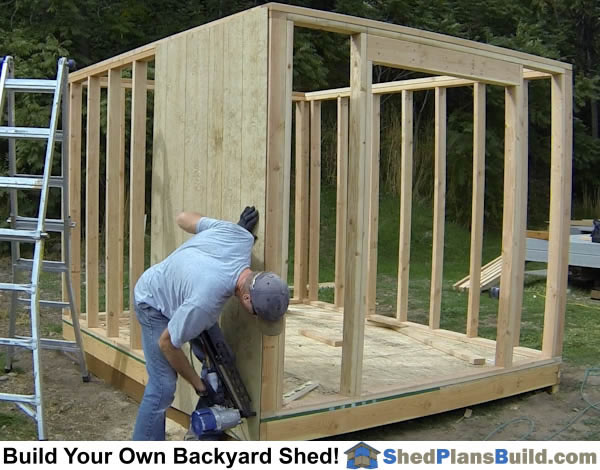 Install The First Siding Nail: Flush the siding sheet with the corner of the shed wall framing. Install one nail on the bottom edge of the siding at the corner of the shed.
 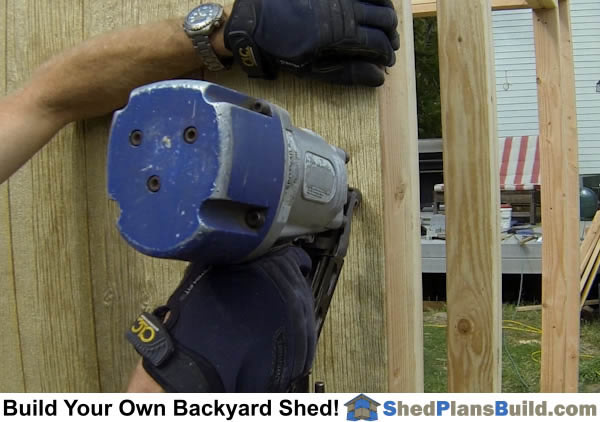 Flush The Siding To The Shed Corner: Move the siding sheet so that the siding is flush again with the corner of the shed wall framing. Install a second nail into the corner wall framing just below the top of the siding sheet.
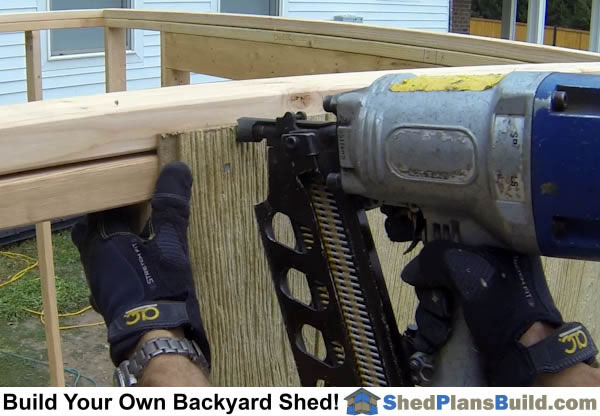 Make The Shed Wall Square: The third nail will stop the wall from moving and make it square. Move the shed wall until the top edge of the siding is parallel to the siding sheet and the vertical edge is parallel to the shed wall stud. Lock the wall by nailing on the opposite top edge.
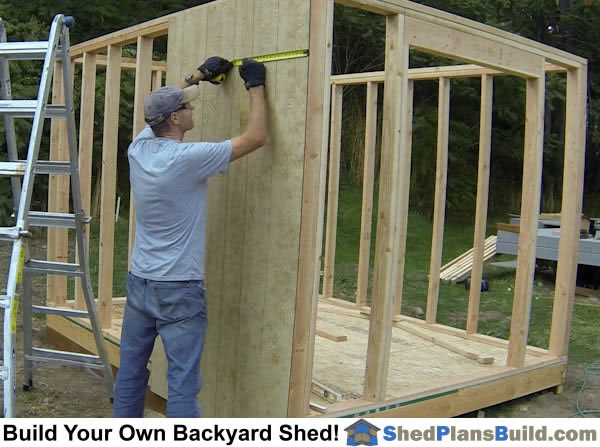 Mark The Stud Location: To find where to place the nails for the center of the sheet measure from the sheet edge and mark the 16" on center layout of the wall studs behind. Mark their location.
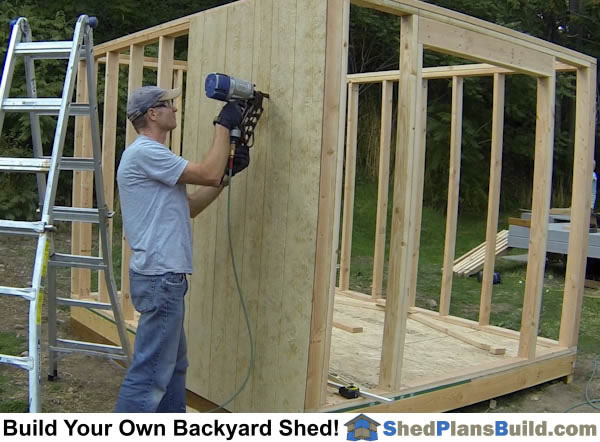 Nail The Sheet: Nail the siding by installing nails at 6 inches on center around the edges and 12 inches on center in the middle of the sheet. Note: Don't install nails along the overlap edge because the next sheet will be nailed on.
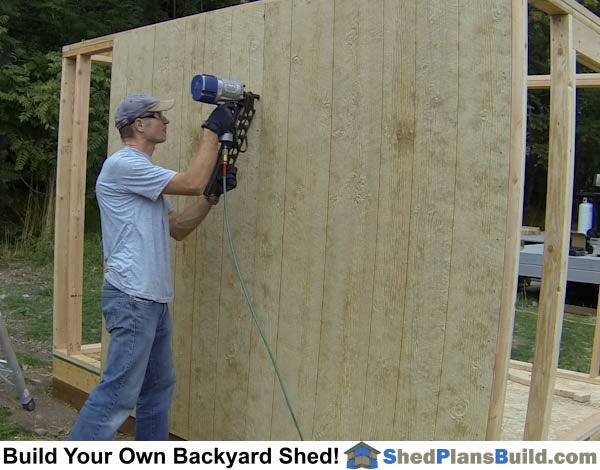 Install The Remaining Sheets: To install the remaining sheets along the wall align the sheet up with the first sheet and make sure the edges are square with the wall framing and nail it on. Mark The Shed Door Siding Reveal: Our shed door plans require that the siding is held back from the door opening by 1". Measure and mark the 1 inch around the door opening.
 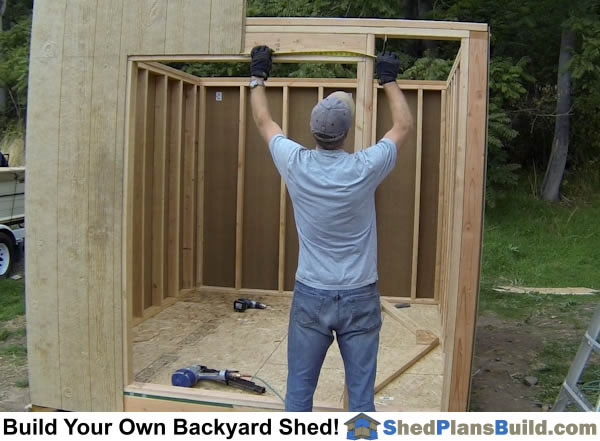 Install Siding Around the Door Opening : Install Siding on the door wall. Make sure that the wall is square and that there is a 1 inch reveal around the door. Double check that the door opening is square before fully nailing.
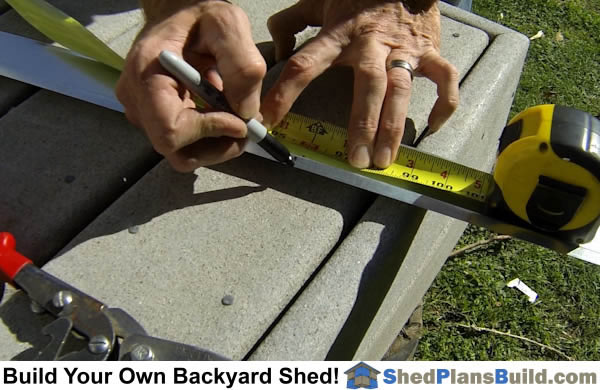 "Z" Metal Install: If your siding has horizontal joints you will need to install "Z" metal between the upper and lower sheets. Measure the length of the metal and cut it.
 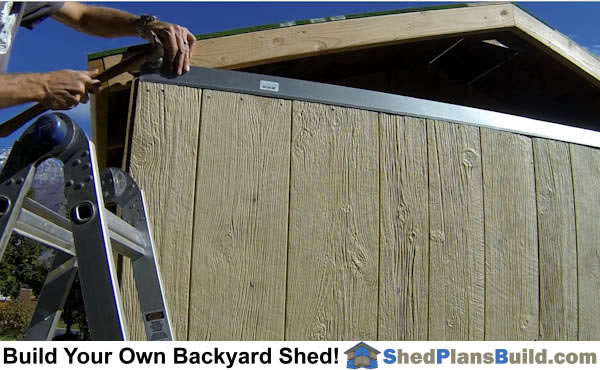 Nail The "Z" Metal On: The "Z" metal is installed on top of the lower sheets before the upper sheets are installed. Place it on the top edge of the sheets and nail it to the shed. Make sure that you nail along the top edge so the nails will be behind the top sheet and water can not run back into the nail holes.Gable Siding Install Technique #1: The first way to install gable siding is AFTER the rafters are on. With this technique you will cut the siding off at the plate height like all the other sheets. Measure the shed to find the siding size.
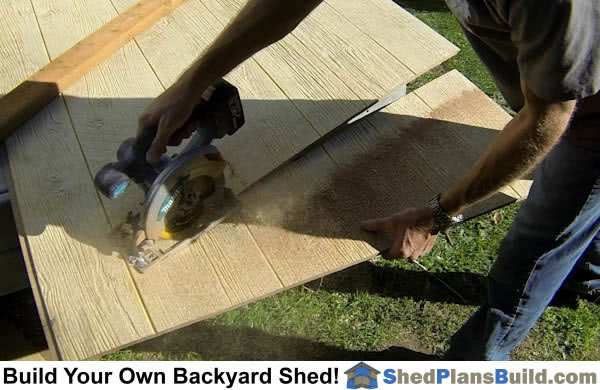 Cut The Siding And Install: Transfer the siding dimensions to a sheet of siding and cut it on the ground.
 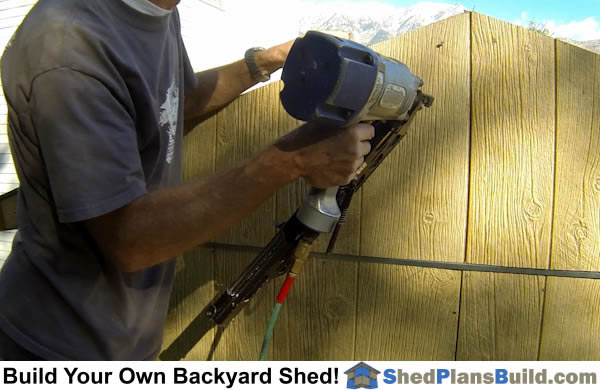 Nail The Gable Siding On: Install nails on the gable siding piece. Make sure to not install nails too close to the "Z" metal joint so water cannot wick up into the nail holes.
  Gable Siding Install Technique #2:The second way is to install gable siding BEFORE the rafters are on by allowing the shee to run long up the wall without cutting it at the plate height.. The siding is then cut after the roof is built and cut off flush with the top of the roof sheeting.
 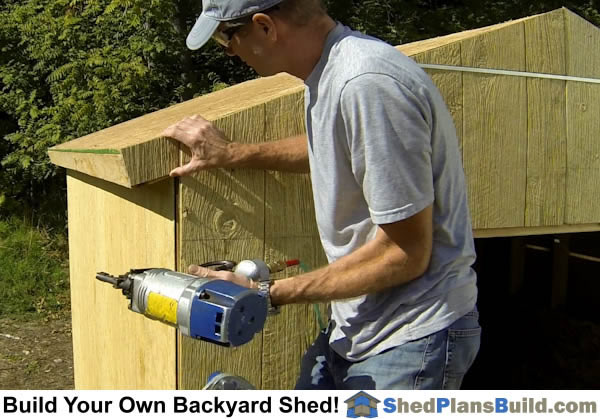 Rafter Tails: Install siding pieces on the rafter tails. This siding will be covered by the trim boards so it does not need to look pretty.
6 - How To Build The Shed Roof
To build the shed roof you will install the rafters you built on the shed wall and then install fascia boards and roof sheeting on the rafters.
7 - Install Exterior Trim On The Storage Shed
To build the shed roof you will install the rafters you built on the shed wall and then install fascia boards and roof sheeting on the rafters.
8 - How To Build A Shed Door
A shed door can be either home built of factory built. The door for this storage shed is home built in a few easy steps.
9 - How To Paint A Shed
Protect your investment. Learn a few simple tricks to get your shed painted and protected from the elements.